
Hey, whatup.
Jump into the narrative at “The Dust of Retreat Part 3” here
I’m beginning my new unit testing for Druze this week, and my first games are against a blog regular, and frenemy “Royalfork” Or Tyler. A master at running through the jungle, and uh being the devil on the loose. He might be our best local Shock Army player, or our only. One of the two. He’s decided to try new units, and list compositions as well. So this match worked out well.
https://www.youtube.com/watch?v=-B7-Vcdlld8&index=15&list=RDuYRZV8dV10w
Some really good camera tracking. And uh, music.
Mission discussion:
Safe Area is one of my new favorite missions. It makes you balance your own survivability, neutering your opponent’s active models. And making sure you manage your specialists positioning. Overall it takes Infinity (THE GAME), a game all about positioning, and makes it the focus of the mission. It also takes those annoying WIP checks out of securing points. Making certain sectorials and factions a little more reliable (Pano lmao). The addition of a classified is nice as well, and gives you a comeback option. My only gripe is that it gets one sided really quickly, as you can see from a recent tournament match (link to jsa vs me). Once any initial advances are blunted, or turned on. You’re pretty out matched points wise, and field control wise. This is of course list dependent, but the current meta trend seems to be 3 activish pieces supported by ARO Bots, and a weaker backfield. Certain factions change this severely (Arianda) but the situation stays the same. You can’t get bogged down being defensive in the midfield. You need to dominate it so you have access to every quadrant, and potential console. This is further aided by rear units as mentioned before. The only difference is these need to be able to hold their own, and score. My biggest fear in this mission is something like Tarik just annihilating my backfield units. Usually an EVO, and some light infantry. So that I have to spend orders walking back to my rear quadrants and consoles. Potentially taking away from my total control over the midfield.
Playstyle discussion for Druze:
I took a change to my Druze play style, and approach to this mission. And in both cases I kind of took it to the extreme. This was to push me out of my comfort zone, and to get away from this meme of a meta with tons of cheap flash pulse bots. I also wanted to try an active gunfighter piece. Something Druze are severely lacking in. That is, a multi wound model with moderate BS, and multiple weapon options. I chose the Anaconda, my reasoning is below in the list discussion, and will probably have a separate post. Overall more aggressive.
Army lists:
Finally to the army lists
SAA:(Tyler list Shock Army of Acontecimento
──────────────────────────────────────────────────
GROUP 1 10
REGULAR Lieutenant Combi Rifle / Pistol, Knife. (0 | 10)
REGULAR Spitfire / Pistol, Knife. (1 | 16)
REGULAR (Sapper) MULTI Sniper Rifle / Pistol, Knife. (1.5 | 22)
TIKBALANG HMG, Heavy Flamethrower, Antipersonnel Mines / AP CCW. (2 | 85)
CRABBOT Flash Pulse / Knife. ()
NAGA (Forward Observer) Combi Rifle, Antipersonnel Mines / Pistol, Knife. (0 | 28)
NAGA (Forward Observer) Combi Rifle, Antipersonnel Mines / Pistol, Knife. (0 | 28)
PATHFINDER DRONBOT Combi Rifle, Sniffer / Electric Pulse. (0 | 16)
FUGAZI DRONBOT Flash Pulse, Sniffer / Electric Pulse. (0 | 8)
FUGAZI DRONBOT Flash Pulse, Sniffer / Electric Pulse. (0 | 8)
BULLETEER Spitfire / Electric Pulse. (1 | 23)
GROUP 23
MULEBOT Hacker (EVO Hacking Device) Electric Pulse. (0.5 | 25)
MULEBOT (Minesweeper, Repeater) Electric Pulse. (0 | 8)
AKAL COMMANDO Combi Rifle / Pistol, E/M CCW. (0 | 22)
6 SWC | 299 Points
[url=http://army.infinitythegame.com/index.html?l=IwBgTAPgzCIRwCkBWMjgE5mIIRNegBwa75qZI4DsKhiYwNOdyJYGVTLbHTJAbCHpgopNP1Fgw/MYgnCZeUfwAswugAFgM/jRFq8OvVFE40yUZhkaNQA=]Open in Infinity Army
Druze Bayram Security:
Anaconda don’t want
──────────────────────────────────────────────────
GROUP 1 9 / 1
DRUZE HMG, Chain-colt / Viral Pistol, Knife. (1.5 | 29)
DRUZE (X Visor) Combi Rifle + Light Grenade Launcher (E/M and Nimbus) / Viral Pistol, Knife. (0.5 | 27)
DRUZE Hacker (Killer Hacking Device) Combi Rifle + Pitcher, D-Charges / Viral Pistol, Knife. (0 | 25)
BRAWLER Doctor (MediKit) Rifle + Light Shotgun / Pistol, Knife. (0 | 20)
ANACONDA Spitfire + Light Flamethrower, Panzerfaust / CCW. (2 | 62)
OPERATOR Spitfire / Pistol, Knife. (- | 0)
VALERYA GROMOZ Hacker (Hacking Device UPGRADE: Expel) Combi Rifle + Pitcher / Pistol, Knife. (0.5 | 21)
BRAWLER (Multispectral Visor L2) MULTI Sniper / Pistol, Knife. (1.5 | 28)
BRAWLER Lieutenant Rifle + Light Shotgun / Pistol, Knife. (0 | 16)
HUNZAKUT (Forward Observer, Deployable Repeater) Rifle + Light Shotgun, Antipersonnel Mines / Pistol, Knife. (0 | 18)
PEACEMAKER Heavy Shotgun + AUXBOT_3 / Electric Pulse. (0 | 21)
AUXBOT_3 Heavy Flamethrower / Electric Pulse. (- | 4)
GROUP 21
PATHFINDER DRONBOT Combi Rifle, Sniffer / Electric Pulse. (0 | 16)
BASHI BAZOUK (Specialist Operative) Rifle + Light Shotgun / Pistol, CC Weapon. (0 | 17)
6 SWC | 300 Points
[url=http://army.infinitythegame.com/index.html?l=JwBgTAPgzCIQggOwIYGMD2iAmyAEXMByAF1wHdlFiIBGAUmAHYQ6oBWADmDoEJ6mW7YGF79mrAGwAWKaNnAOjSe15sGjKJJCa+ahSKgSa3PvMXL6phucNQlPCetmGQ9pUzUuOdAALemjoY0lvKMBhJQ3j4+QA===]Open in Infinity Army
I love the Anaconda. Okay sorry, list first.
Standard Druze Link is expected. You can swap between Valeryia if you have repeaters out, or the MSV2 sniper. Otherwise it’s:
Druze HMG
Druze KHD
Druze LGL
Brawler doctor
It can really solve any problem, and is a great aro puzzle for opponents. You just pack them into a structure, covering angles with viral pistols and chain colts. Back them up with some kind of disposable unit like a peacemaker or a long range aro (MSV2 Brawler) and you’re golden, ironclad, bullet proof.
Pathfinder is there for a fast specialist that can either sit in the back as mentioned before and quickly grab objectives. Or play middlefield and with it’s speed, cover the back objectives if it goes to crap. It’s also a really fun little gun fighter that can double duty as scanning nerds, and revealing nerds. Throw MMSv2 on it and it’s extra fun blasting them apart. On that point, the Peacemaker does a far better job. It’s multi use drone, and repeater can cover your link team. And serve as an assault piece to remove nasty aros or cheap suicide troops so your link can mop up. For safe area this bot can simply cleanse a quadrant of mid field infiltrators. Combine him with our pathfinder buddy and you can sweep out camo, and even some dug in AD troops.
On the subject of AD troops. The bashi is amazing as I’ve found out recently. Surprise shot, and a cheap specialist. He can come on, waste whatever is left in the midfield, and just piss your opponent off. I’ve found a fun sport in hunting snipers with him. Or any longer range weapons that are forced to advance into the midfield once you’ve killed their initial advance. In non specialist missions the combi rifle emauler is amazing, and has an OG model that is ugly as shit.
The Hunzkaut is a classic pick and really just gives you more flexibility to control the mid field. Dropping mines, repeaters, or just skirmishing. Playing camo skirmishers in an offensive role is fun as hell. Killing snipers, auto cannons, you name it. Getting into that >16inch range band and just whacking them. The specialist option just solidifies their pick for safe area. (It’s not like you’re not going to take them anyways. They’re just an incredible unit for DBS)
Alright the Anaconda. Unfortunately this game didn’t highlight the incredible utility this god given creation brings to DBS. But that’s for another post. Her role in this list (Yeah it’s a her, like a mix of my ex (two ex’s ago, sorry Seana you’re not tall enough) and that goth chick that made fun of me in 11th grade, but ultimately had a crush on me because of my dodgeball abilities.) is simply to hold, and clear quadrants by herself. The spitfire range bands work well with the silhouette, with it being slightly shorter than the average building, but above scatter terrain. Getting onto rooftops with it just makes it stupid easy at picking off skirmishers, and the odd medium infantry that gets pushed forwards. Flamethrowers solve camouflage and CC units. And the panzerfaust will take out whatever else you need, and provides a deadly ARO. The Ejection system is hilarious and can be a playmaker if used right. If supported right, once the TAG itself goes down. Your team can advance into it, and make a new angle for the MSV sniper. And the multiple structure mean it’s not dying immediately like the other parts of the list. The rest deserves a post of its own. But you get the gist.
Anyways, after that spiel, let’s get into board and deployment.
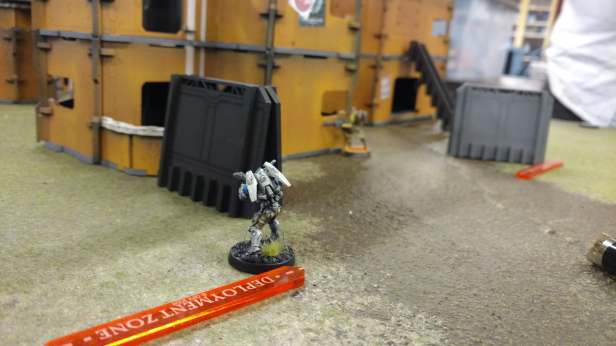
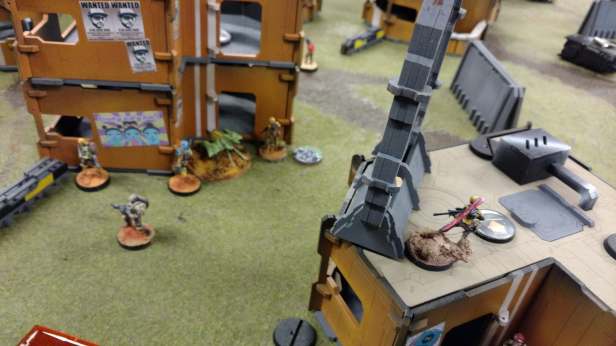
Board picture
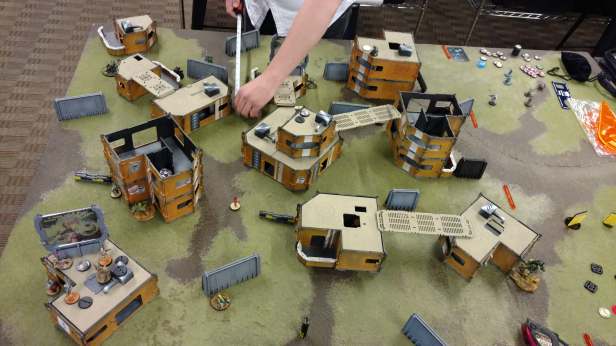
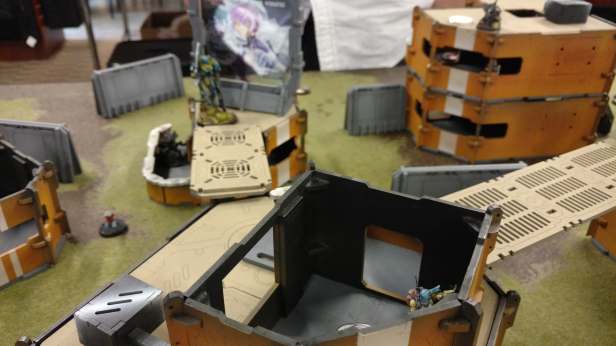
Moderately vertical board with a nice center line for skirmishing units. Not a lot of deployment zone cover, but it’s N3, why does anyone go back there anyways? Sides had good space for AD play, and flanking maneuvers. A few large LOF alleys existed once you got to the second level of buildings. But uh, that’s what happens when you climb on roofs. Tag lanes existed, but only through the center (Unless you had Climb+ hohoho). And there was a solid spacing around the center consoles.
This awesome table was made by Sean Poeschel of the Remote Presence podcast. And was held at Tower Games in Minneapolis. A really nice place, despite some Magic the Gathering dude asking me questions about Magic the Gathering. While I’m clearly playing Infinity the Gathering, er game. Terrain is Topdown Terrain, and meat hands are courtesy of Tyler.
(Not related, but this needs to be said. My neighbors are a 70+ year old couple. And they make the MOST NOISE I HAVE EVER HEARD. I’m writing this thing at 2am while waiting for a work project to render, and this chick to text me back. And they are knocking stuff over, and microwaving things. At 0200! I swear I heard glass shattering)
I won roll off with my incredible Brawler intellect. And chose turn order, and to go second. Really wanting that last turn move, and to test my defense capabilities. Trying to keep my anaconda alive etc.
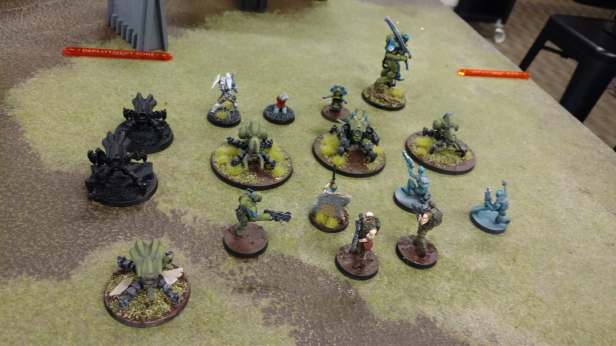
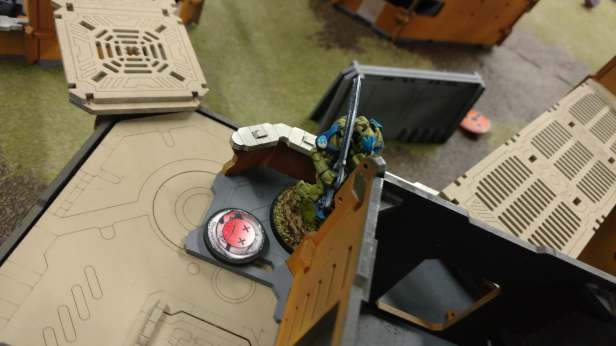
My deployment:


Druze Caruze goes down in bottom left building, Sniper and LT on roof. Doc inside, with HMG just outside, KHD inside near window ready to hop out. Everyone is prone lmao. Pathfinder goes near them to support them in sniffing out nerds. Peacemaker is my reserve model and goes in front of the team for a final support push. Hunzakut goes in middle building (prone lmao). This was to distract and try to get some repeater coverage down. Also as a road bump.
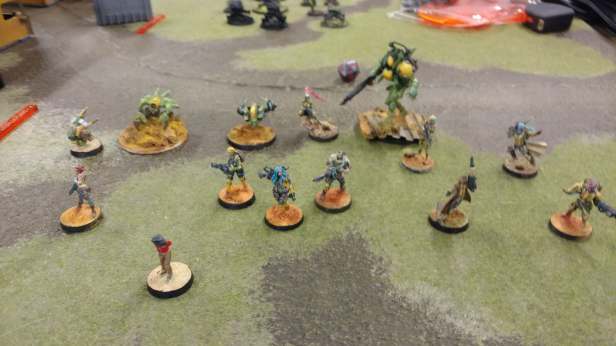
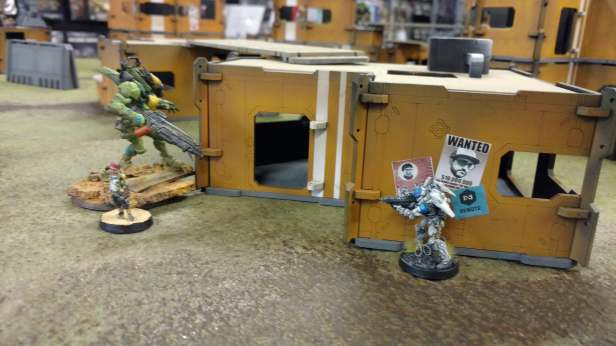
SAA Deployment:


He goes balls out and throws multiple units on the center line in an attempt to control quadrants ASAP. Tikk goes in the middle to utilize the climbing plus. And his sniper and link go in the far building, expecting to lock down the center.
Narrative:
Due to the length of the narrative, you will be able to read it in “The Dust of Retreat Part 4.”
SAA turn 1:
A general advance happens with a combined order going out to move his fugazis a few inches forwards to claim the initial quadrants.
His sniper wastes my LT who was sticking out too much (d’oh!)
His Buleeteerrrrr goes on suppression down an alley.
His pathfinder rolls up and sensors my hunzkaut, who pisses herself.
The tikkbalang climbs onto the center structure, and shoots at my Hunzkaut she dodges
Tikk moves forwards and kills my hunzkaut
Here’s where some mistakes were made.
Combined order goes out to the bots again, and the Tik is added to it. Tik walks a little too far forward, and is seen by my Anaconda. And she don’t want none. Panzerfaust goes out and boom, boom, boom. The tikbalang goes down.
He does a small retreat, but is out of orders.
The tikbalang going down shifted the entire first turn. I thought my Ad coming in on the right would be left in the wind for the tag. Also losing my LT wasn’t too bad with his tag out. But now that I had the Tagvantage, I could over pressure either side. Either with my AD and TAG, or the link. Also, Anaconda 1, Hitech factions 0!
Druze Turn 1:
I reform link
I gun fight my sniper versus his. We tie.
I move my pathfinder up and sensor his Naga
My peacekeeper rolls his auxbot around and toasts the Naga.
My sniper whacks his Buleeteer from out of 24 range
I start advancing my link out of the building, and into the middle quadrans on the left.
My Bashi Bazouk lands and moves.
Moves and kills a pathfinder.
Re holos
Kills his sniper from inside 12 inches.
My link advances and HMGs a fugazi apart.
My link advances and kills another Fugazi. (this was weird, I crit twice.)
I end my movements


Veteran pulls through for me in a huge way here. Druze are just so badass they don’t care about Lieutenants. As mentioned before, moving to secure your middle zones is the easiest thing in this game positioning wise. You just hide, then kill the threats and move. If you can’t do that after turn one, your list building is wrong, or you are. My Bashi had secured the right side, and would be a pain to dig out. That light shotgun just being a pain for FTF rolls. My Druze were a little more exposed than I would like at this point. But I ran out of regular orders, and was feeling confident with his tag being down.
SAA turn 2:
His spitfire shuffles over and shoots at my Bashi, my bashi guts back.
He brings on an Akahl right behind my bashi.
Akahl shoots bashi, bashi guts back.
Akahl shoots bashi, killing him.
Akahl move moves, ignoring a rifle shot.
Akahl move moves
Akahl move shoots my Anaconda doing a wound, and ignoring the flame thrower.
Akahl shoots my anaconda, destroying it, and then the Akal dies to the flamethrower.
His turn overall could have gone better. He didn’t really have the orders to relocate, and his units didn’t have the speed either. His link team should have been moving up into the nearest quadrants but the awkward ass building they were in stopped him. Also my bashi taking 3 orders, and the Anaconda 4ish, was a little unlucky.
Druze Turn 3:
I move forward to secure every zone.
Anaconda operator steps out and stomps on Akals neck
Druze take left two quadrants
Anaconda take front right
Pathfinder moves into rear right.
I engage and kill his Regular spitfire with my Anaconda operator.
Druze HMG engages and kills remaining rems.

At this point Tyler asks for a re-rack, a do over, and concedes.
Druze victory 10-0
The game was decided pretty early on with the Tikk going down. But with my limited reaction due to LoL there was still a chance. Unfortunately things didn’t die when they should have. And Royalfork ran out of orders.
Dominating the left side of the field with the Druze link, while picking off his weaker units on the right was a winning strategy. Even with his Tikk alive, it would have had to burn multiple orders getting to my sniper, and still having a duel with her. Her being BS18, him on Flat 15 would have been dicey. And that was without the Anaconda in the picture. I was excited to try the Anaconda out more, but even in operator form you have a competent gunfighter. I need to actually check LOF instead of assuming the HVAC units can hide my LT. Or you know, just realize when my LT is hanging in the wind.
Every piece did their job overall, and worked out how I wanted them to. Pretty solid game overall on both sides, just some poor positioning on Tylers side, and inexperience in using S6 models led to his overall demise.
